When you look back at the photos or videos you’ve taken and notice some are poor quality, how do you handle it? Compared to traditional methods, AI can help us enhance images and videos more efficiently. Let’s take a look!
Why Do Low-Resolution Videos Look Blurry?
When low-resolution video appears blurry, resolution is only part of the problem.
Low-resolution images contain fewer pixels. When a video has fewer pixels, its image quality degrades significantly. Compression further worsens this by removing visual information to reduce file size. This can result in blockiness, jagged edges, blurriness, and a dull, lifeless appearance.
Repeatedly converting, exporting, sending, or downloading the same file exacerbates these issues at each stage. These flaws are particularly noticeable on large monitors, TVs, and laptop screens.
Furthermore, since we primarily encounter 1080p and 4K content in our daily lives, the visual differences are very noticeable when watching 240p or 360p videos. A photo that looks clear on a smartphone may look blurry on a desktop monitor. Details such as faces, text, and logos often lose sharpness first.
Can AI Upscaling Improve Low-Resolution Images and Videos?
One thing is certain: AI can enhance the image quality of low-resolution media.
Traditional image upscaling enlarges images by interpolating existing elements. AI uses trained models to analyse an image’s elements and, based on that analysis, reconstructs the pixels that would otherwise be missing after upscaling.
AI video upscaling technology analyzes each frame, reasonably infers missing details, and restores them, thereby improving the image quality of low-resolution videos and making the footage clearer and richer in detail. AI predicts and restores all details based on every frame of the original video. This difference will be particularly noticeable for users who download low-resolution videos, such as old home videos, archived footage, screen recordings, or social media clips.
AI cannot generate details that didn’t originally exist, but restored images and videos look more realistic and deliver better results.
Windows: Separate Image and Video Upscalers
The Windows version of the Upscal product family includes Upscal – Image Upscaler and Upscal – Video Upscal. These two applications are designed for different media types: the first focuses on still-image enhancement, and the second on video upscaling and enhancement.
macOS: Image and Video Enhancement in One App
Upscal also offers a macOS version that lets users enhance images and videos in one app. The Mac version supports multiple AI models, including Fast, Sharp, General, and Anime, providing users with more tailored options for processing different types of images and videos.
iOS: AI Enhancement on Mobile
For iOS mobile users, Upscal supports iPhone and iPad. The iOS version supports 2×, 4×, and 8× image upscaling, as well as video enhancement powered by the Fast Model, which is optimized for mobile hardware.
macOS also offers more advanced “Sharpen,” “General,” and “Anime” video models.
Choose the Right AI Enhancement Settings
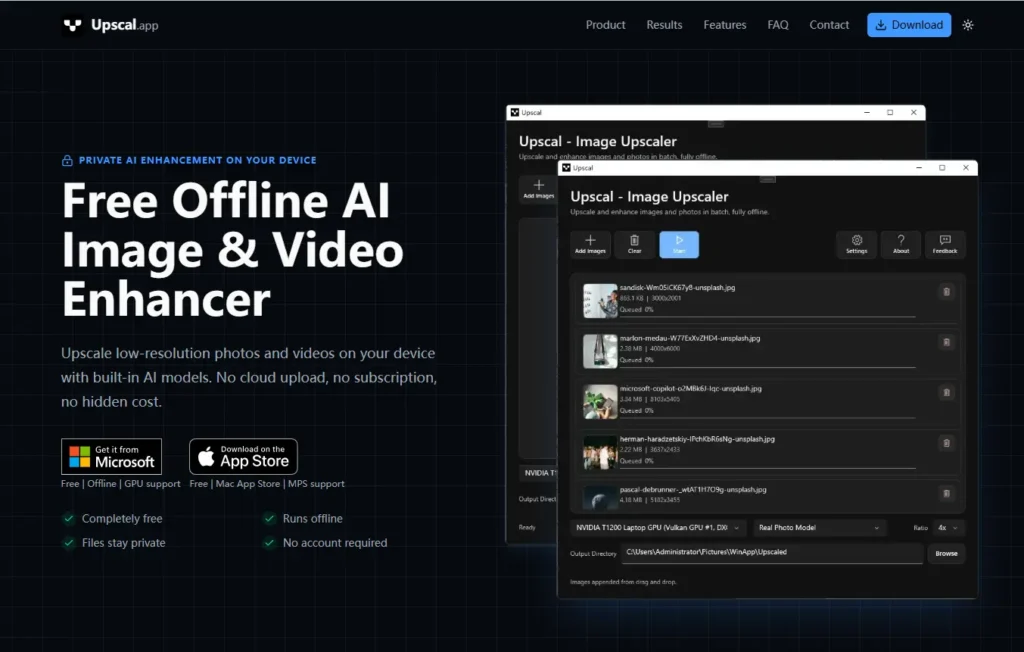
Currently, the Windows version of Upscal offers image upscaling settings: three different image processing models—Real Photo Model, Anime Model, and High Quality Model. There are two upscaling factors: 2x and 4x. One option outputs at 72 DPI, while the other outputs at 300 DPI.
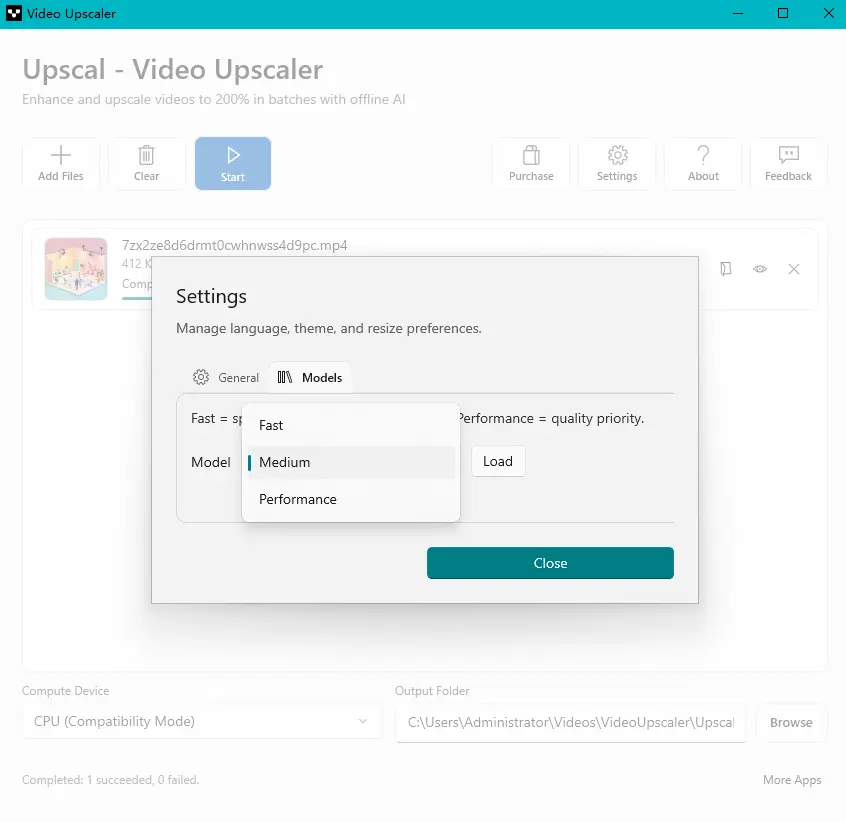
The three video upscaling models are Fast, Medium, and Performance. The Performance model provides the best enhancement results, the Fast model processes the fastest, and the Medium model is a general-purpose option.
A more efficient approach is, if possible, to extract a short clip of just a few seconds from a key segment of the video before processing and use it for testing, so you can select the model that best matches your expected visual results from among these three.
How to Use Upscal to Enlarge Images on Windows?
Step 1: Install Upscal
Download and install the Upscal app for Windows. Launch the app.
Step 2: Add an Image
Click the first icon on the far left of the program. Click “Add Images” to add an image.
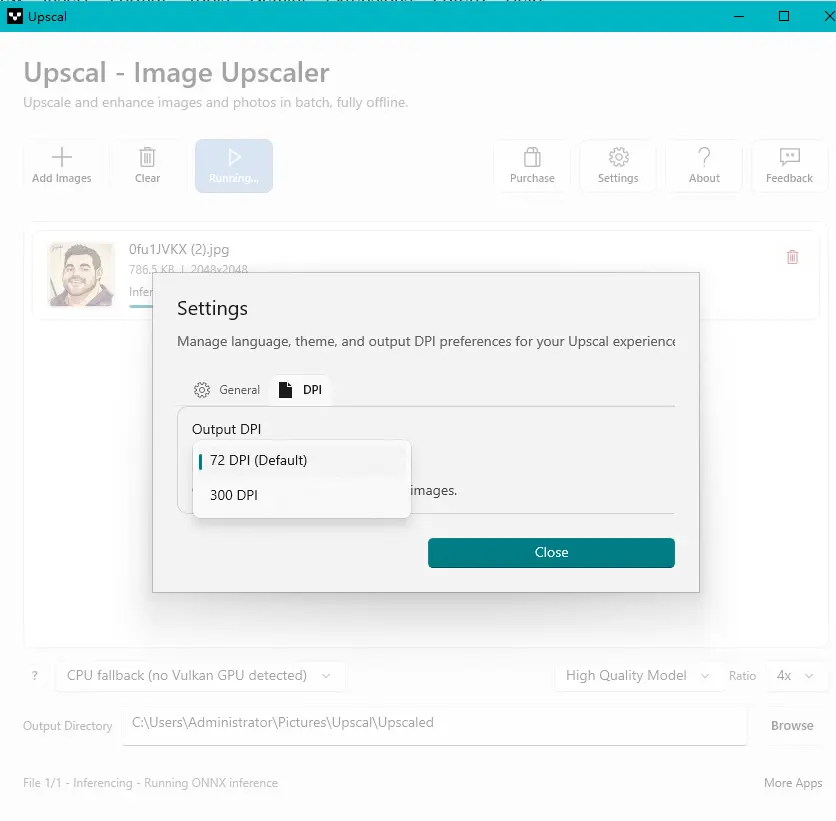
Step 3: Select Upscaling Settings
Choose the appropriate upscaling options based on the image. Select an image processing model that matches the image type—Real Photo Model, Anime Model, or High Quality Model—as well as an upscaling factor of 2x or 4x. Click “Settings,” then select “DPI” and choose an output resolution of 70 DPI or 300 DPI based on your needs.
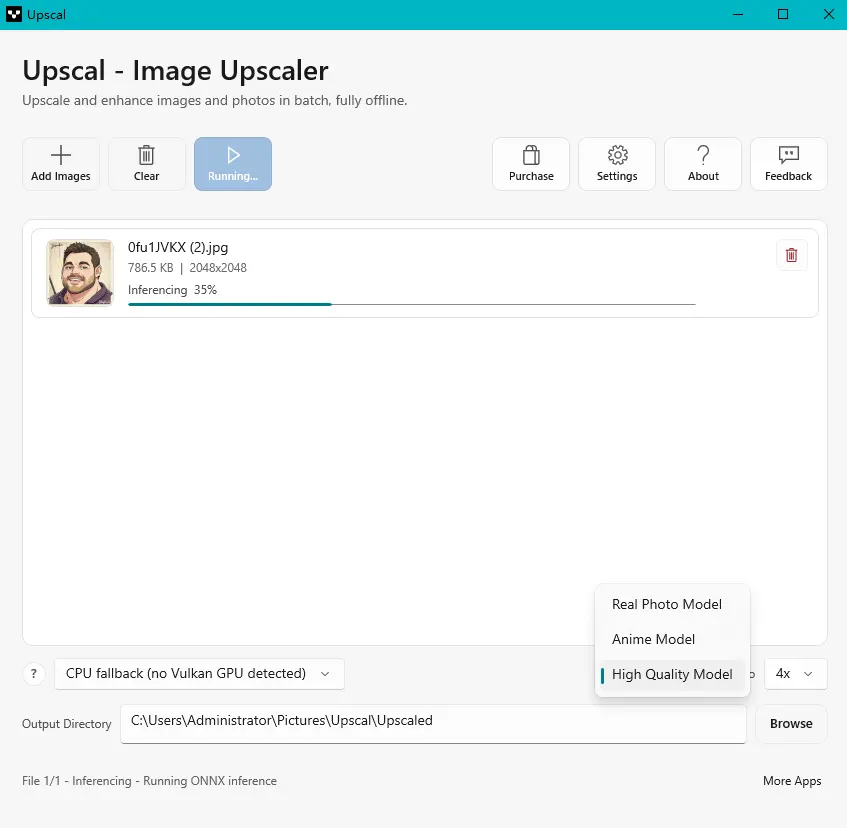
Step 4: Start the Upscaling Process
Once the settings are complete, click “Start” to begin the AI enhancement process, and wait for Upscal to finish processing. The time required for local processing depends on your computer’s hardware, the size of the original image, and the selected settings.
Step 5: Compare the Original and Enhanced Images
Once processing is complete, review the results. Check whether the image as a whole has become clearer and whether the details look natural.
How To Upscale A Video With Upscal?
Step 1: Install Upscal
Go to the Upscal official website or the Microsoft Store to download the appropriate version and install it on your computer. The following steps use the Windows version as an example.
Step 2: Select the Video
Select the low-resolution video you want to optimize. Click the “Add Files” button to add the video. For your first test, please use a short video clip that’s a few seconds long. This will help you test and fine-tune the model efficiently. Next, select the save location for the processed video in the lower-left corner.
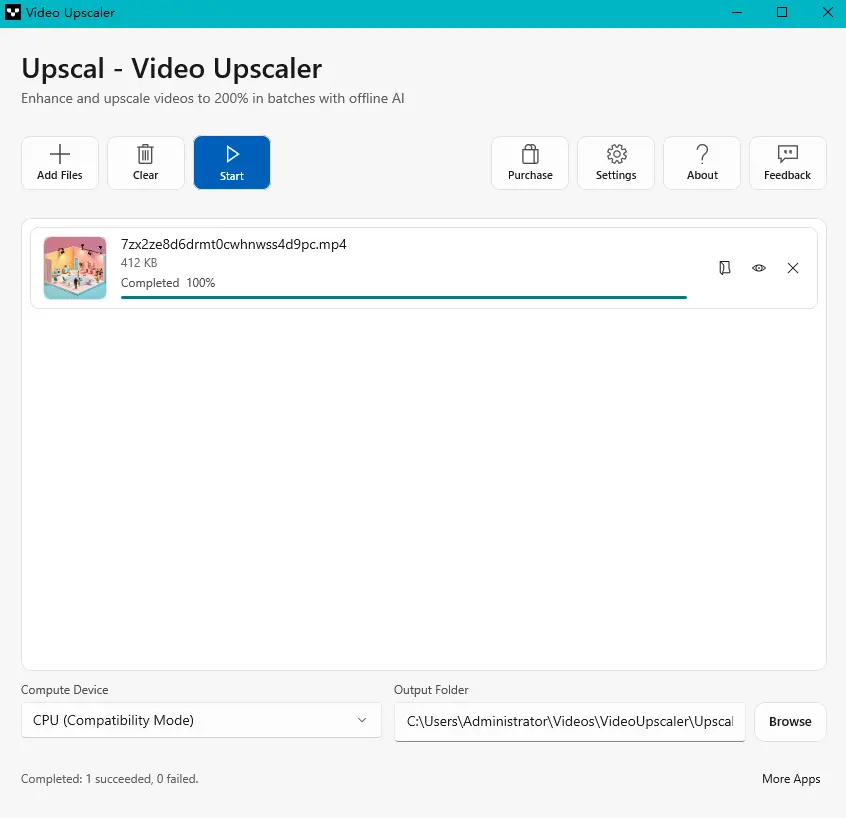
Step 3: Select the Model
Click the “Settings” gear icon and select “Model.” Choose the upscaling model you want to use from Fast, Medium, or Performance. Once selected, click “Load.”
Step 4: Start Processing
Click the blue “Start” button to begin processing the video. The enhancement is performed locally. Depending on your computer and the video, this may take some time.
Step 5: Check the Results
Step 5: Compare the Results
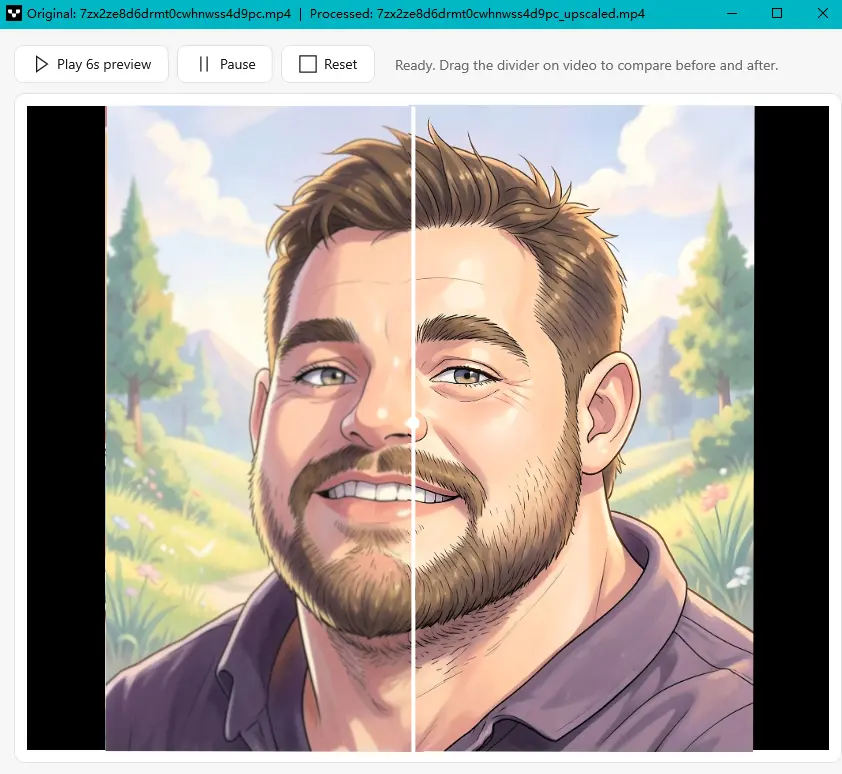
Click the eye icon next to the video to view the comparison. Please watch several clips. Don’t judge the overall video quality based on a single frame.
How Long Does Video Upscaling Take?
Image interpolation is typically much faster than video interpolation because videos consist of hundreds or thousands of individual frames. Upscal uses offline processing, so processing time depends on the video footage and your computer’s configuration.
Processing a short, low-resolution video on a high-performance machine is much faster than processing a longer 1080p video on an older laptop. AI video enhancement requires analysing and processing many frames, so even a short video can consume significant computational resources.
For example, a 10-minute video at 30 frames per second contains approximately 18,000 frames. If the AI workflow needs to analyze and enhance every single frame, it’s easy to see why the computational demands of video processing far exceed those of upscaling a single photo. Higher output resolutions further increase the workload. This is why local AI applications benefit from GPU acceleration—and why computer hardware has such a significant impact on the user experience.
Does Upscal Work Offline?
Offline operation is one of Upscal’s key features. Upscal fully supports offline operation, and the software does not upload, transfer, or store users’ images, videos, or personal files to external servers during normal operation.
When working with personal media, local processing gives you more direct control over your source files and exported files.
When digitizing home videos, private footage, client materials, or unpublished creative works, you may not want these files stored on third-party servers—even temporarily.
Final Thoughts
Images and videos are a form of documentation. Even with low-resolution media files, we can use Upscal to transform them. Upscal’s true value lies in its ability to repurpose low-quality media files. Upscal enhances image and video quality while respecting your privacy. Do you have a video or Image you’d like to enhance? Cut a short clip and give it a try right now!
Leave a Reply